Excel, while highly revered for its infinite data-crunching power, isn’t particularly geared toward printer-friendliness. But occasionally, you will want to get your spreadsheets on paper. While encryption and password protection tools in Excel will keep your spreadsheets secure in their digital form, a watermark can help properly mark and control your sensitive data when you print it out. In this article, we’ll show you how by demonstrating first using a video tutorial and, below, using step-by-step instructions.
Add an Image as a Watermark to Your Workbooks in Excel
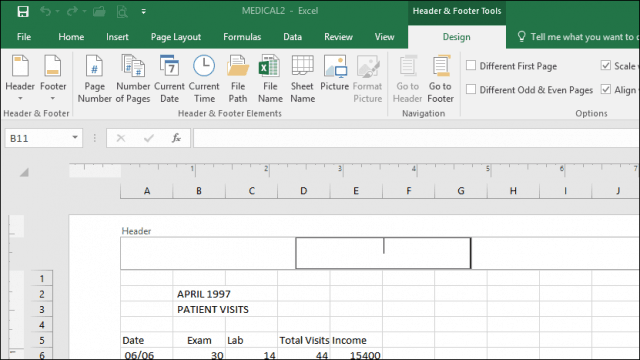
Compared to Microsoft Word documents, formatting in Excel is a little unintuitive. Working with watermarks in Excel is no exception. There is no built-in watermark feature, so instead, you’ll have to insert an image into your spreadsheet and then tweak it a bit. The place to add your image is in the header. To do this, go to the Insert tab and click Header & Footer. This puts you in the Header & Footer Tools ribbon and lets you start editing the header. Click Picture to add a picture.
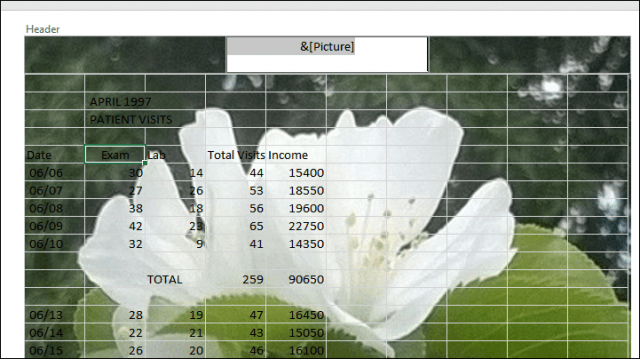
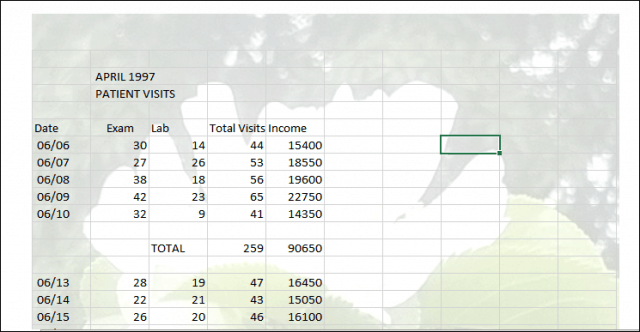
Unlike Microsoft Word, you initially won’t see a preview of what you just inserted. Instead, you’ll only see a text string until you click outside of the header. As you can see, the image I just inserted clashes with the data. You can modify the image by clicking on the header and footer again, clicking the Format Picture button, and selecting the Picture tab. There you can adjust the brightness and contrast in the Image control section. You can click in the Color drop-down then choose Washout for a good watermark effect. Now your data won’t get lost in the image.
Use WordArt to Add Watermark in Excel
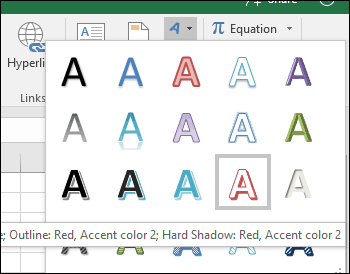
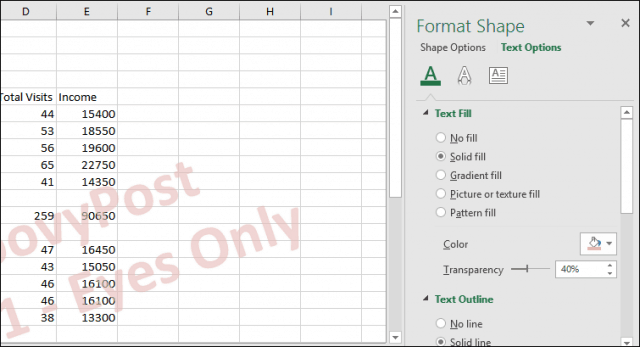
For text-based watermarks, you can use Word art. This is similar to the method used to add a watermark in Microsoft Word. The steps are pretty much the same in Excel. Select the Insert tab, click on the Word Art menu, then choose the desired style. Enter your watermark text, right-click the Word Art text, then click Format Shape.
This will activate the Format Shape task pane. Click the Text Options tab, select the Text and Fill tab, then expand the Text Fill and Outline menus. Use the Transparency slider to adjust the opacity of the WordArt. There you have it. Please tell us what you think. These instructions and screenshots were put together specifically for Excel 2016 and above. If you are running a previous version of Excel, review our instructions on adding watermark in earlier versions. For more tips on Excel, check out our post on 10 Microsoft Excel Tips Every User Should Know. Is there any way I can tell Excel to use a particular font and a chosen size for cells and a particular font and a chosen size for comments (and not deviate) for all the sheets in my excel book? Comment Name * Email *
Δ Save my name and email and send me emails as new comments are made to this post.
![]()

