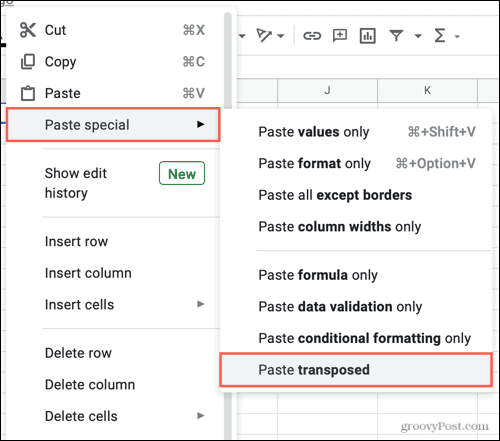
You may set up several columns only to discover; they would be better suited as rows or vice versa. Just like the transpose feature in Microsoft Excel, Google Sheets gives you the same option. This lets you easily convert rows to columns or the opposite.
Convert Rows and Columns in Google Sheets
You’ll use the same process in Google Sheets to convert rows to columns as columns to rows. So, sign in to Sheets, open your workbook, and pick the sheet you want to use.
You should then see your data flipped to the new layout. For this how-to, we converted rows to columns, as seen in the screenshot below.
Remove the Original Data
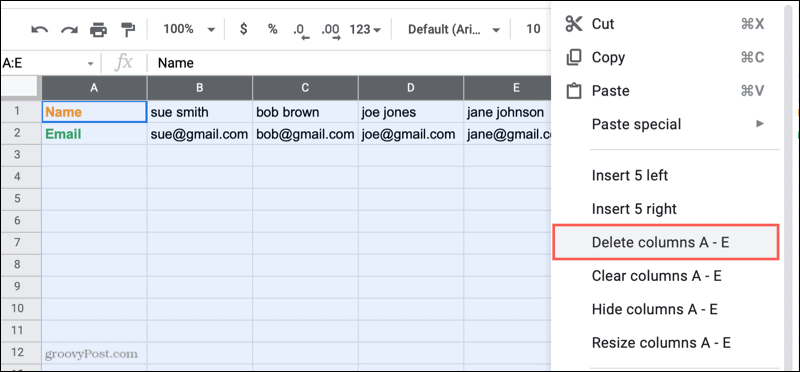
Now that you’ve converted your rows to columns or vice versa, you still have the original data in place. So even if you use the Cut action instead of Copy in Step 2 above, that data remains. But you can easily remove it by deleting the data in the cells or removing those columns.
Select the cells containing the original data and hit your Delete key.Select the columns by dragging through them. Either right-click or click the arrow next to a column header and pick Delete columns X – X.
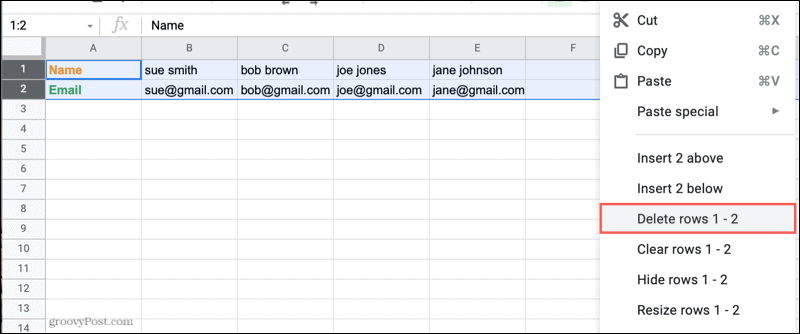
Depending on where you pasted the transposed data, you may also be able to remove rows. Just be sure your converted data isn’t affected.
Select the rows by dragging through them, right-click, and pick Delete rows X – X.
Tip: If you accidentally delete data, hit the Undo button on the left side of the toolbar. You can click the button continuously to undo each last action in order.
Make Your Google Sheets Layout Work For You
You don’t have to be stuck with the layout you select when you first create your spreadsheet. With helpful features like transpose, you can easily convert rows and columns for the best way to display and work with your data. For related topics when working on your spreadsheets, take a look at how to freeze, hide, or group columns and rows or how to get column statistics in Google Sheets. Comment Name * Email *
Δ Save my name and email and send me emails as new comments are made to this post.
![]()


