Disable Extensions in Microsoft Edge
To get started, click on the Settings and more button (three dots) in the upper right-hand corner of the screen and click Extensions from the menu.
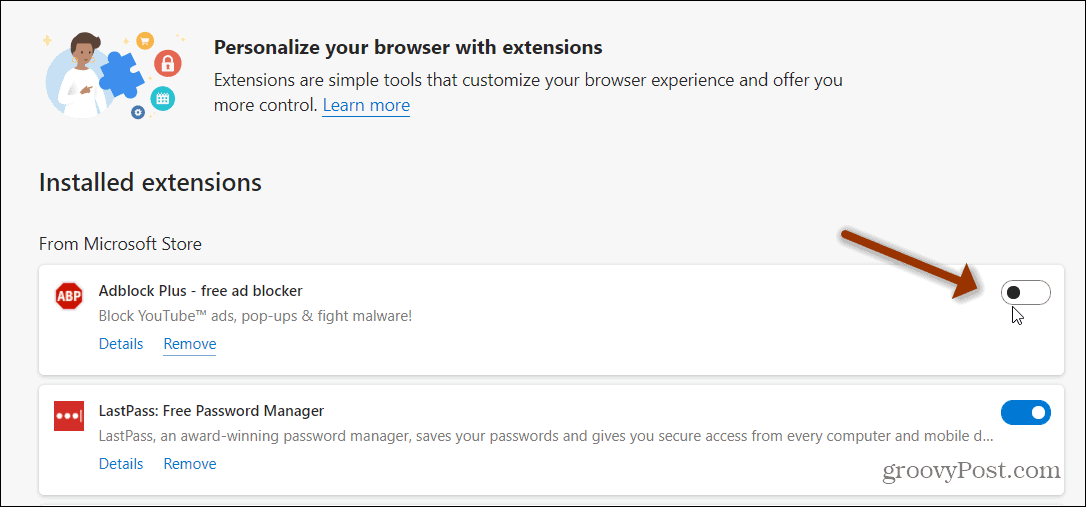
That page will display all of the extensions you have installed in your browser. Either from the Microsoft Store or from other sources like Google Chrome extensions. Locate the one you want to disable and toggle off the switch.
That will turn off and disable the extension. That will also remove the extension icon from the Edge toolbar. Do that for each of the extensions you want to disable. If you want to re-enable it later just go back in and flip the switch back on. Now, another way to get rid of an extension you may no longer need is to uninstall it from the browser completely. To do that, go to the Extensions page (Settings and more > Extensions) and click the Remove link under the extension’s description.
A small screen will pop up. Just click the Remove button and the extension will be uninstalled from the Edge browser.
You will see a small verification message letting you know it has been removed. You can either click out of it or it will disappear after a couple of seconds.
It’s also worth noting that you can uninstall an extension from Edge from the toolbar icon. Right-click the icon of the extension you no longer need and click “Remove from Microsoft Edge” from the menu.
That’s all there is to it. You might want to disable an extension that you are no longer using by flipping the switch before uninstalling it. That allows you to easily go back in and turn it back on if you want to use it again. Otherwise, if you remove an extension completely you will need to go back to the store you got it from and reinstall it again.
![]()


![]()
