Whatever the reason, taking a screenshot on any iOS device is really simple and here’s how to do it.
Take a Screenshot on an iPhone with a Home Button
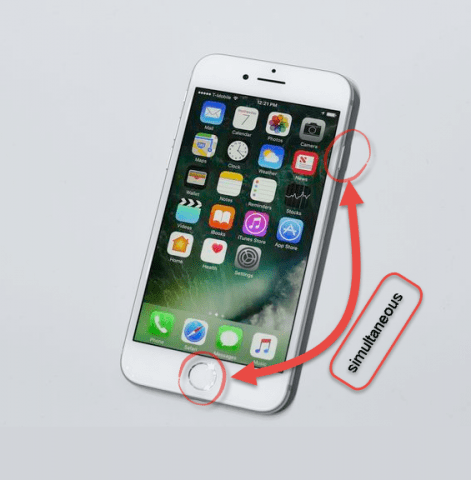
If you have an iPhone 8 or prior, press the Home button and the Sleep/Wake button at the same time. The screen should flash and you’ll hear a shutter noise if your phone is not muted.
A thumbnail of the screenshot temporarily appears in the lower-left corner of your screen. Tap the thumbnail to open it (and edit it, if you want) or swipe left on the thumbnail to dismiss it. It will automatically go away after a few seconds. The screenshot is added to your camera roll in the Photos app and added to the Screenshots album.
Take a Screenshot Using the Buttons on iPhone X and iPhone 11
On an iPhone X or later, the process of taking a screenshot changed because there is no Home button, but it’s still simple. The only difference is that you press the Volume Up button and the Side button (previously known as Sleep/Wake button) simultaneously and quickly, rather than the Home button and the Sleep/Wake button. Just like on older iPhones, a thumbnail of the screenshot temporarily appears in the lower-left corner of your screen. Tap the thumbnail to open it (and edit it, if you want) or swipe left on the thumbnail to dismiss it. It will automatically go away after a few seconds.
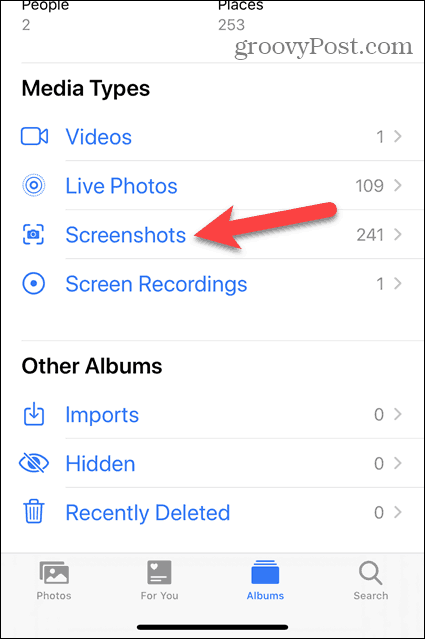
The screenshot is added to your camera roll in the Photos app and added to Screenshots under Media Types on the Albums screen in the Photos app.
Take a Screenshot Using AssistiveTouch on iPhone X and iPhone 11
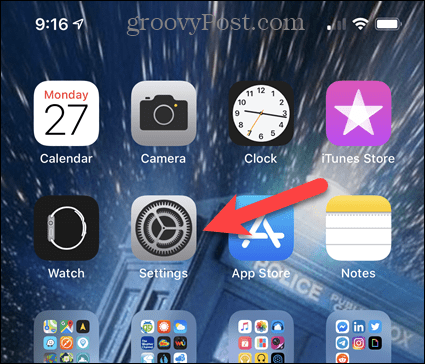
If you need or want to take a screenshot with only one hand, or you’re not comfortable using the new button combination, you can take a screenshot using Assistive Touch. AssistiveTouch is not enabled by default. To enable it, tap Settings on the Home screen.
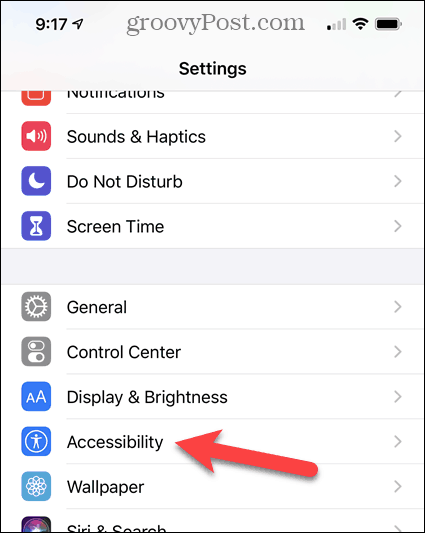
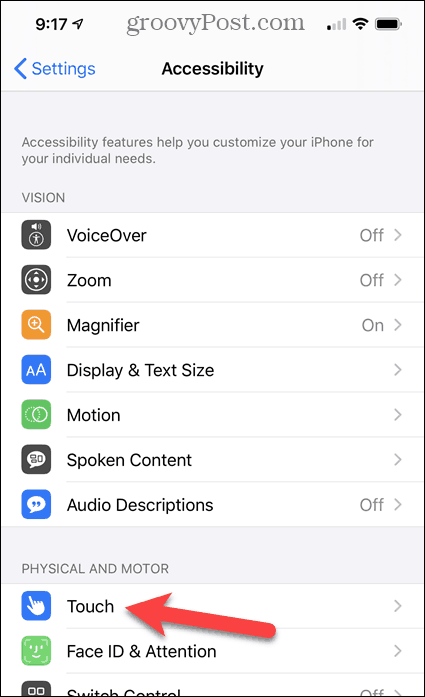
On the Settings screen, tap Accessibility.
Tap Touch on the Accessibility screen.
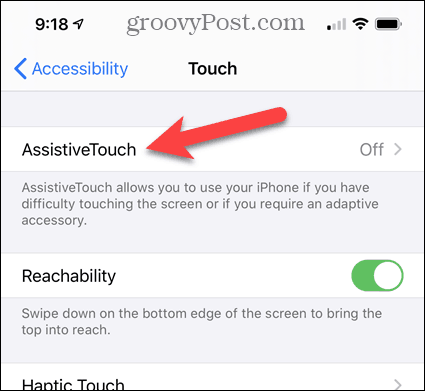
On the Touch screen, AssistiveTouch is Off by default. To enable it, tap AssistiveTouch.
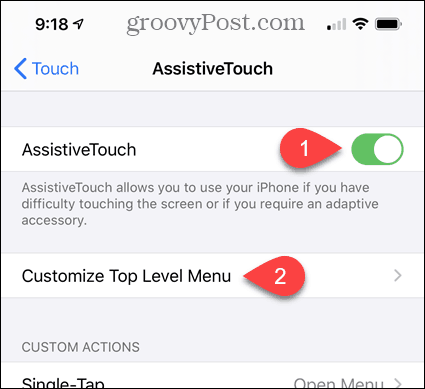
Tap the AssistiveTouch toggle button, which turns green when enabled. Now, we need to add the Screenshot option to the AssistiveTouch menu. Tap Customize Top Level Menu.
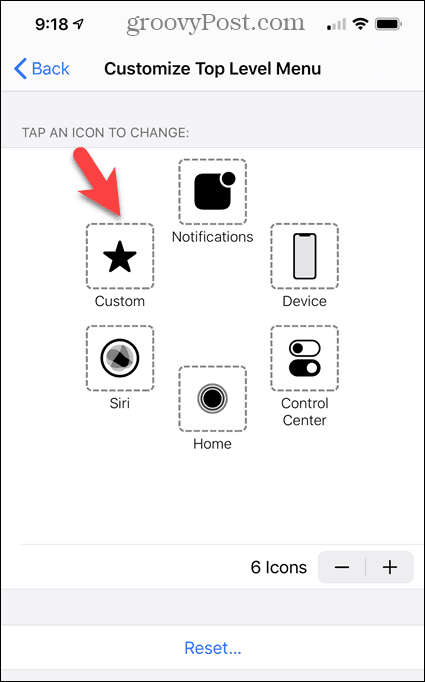
You can replace any of the existing options with the Screenshot option, or you can use the plus icon to add another menu option. We’re going to use the Custom option, so we tap on the Custom icon.
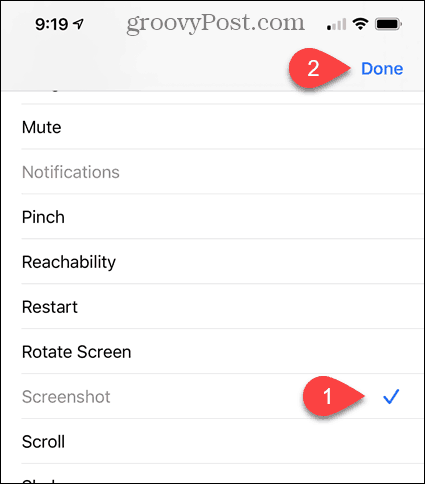
Select the Screenshot option in the list and then tap Done.
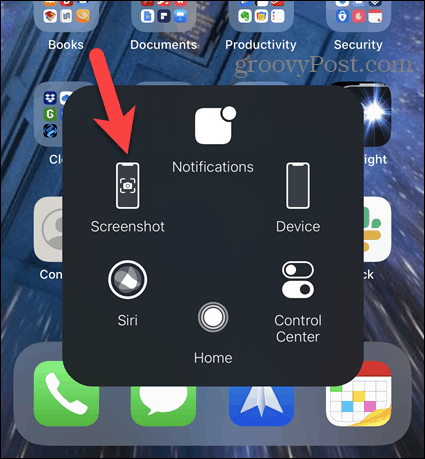
You’ll see the AssistiveTouch button on your home screen. To take a screenshot, tap the AssistiveTouch button and then tap Screenshot.
Edit a Screenshot
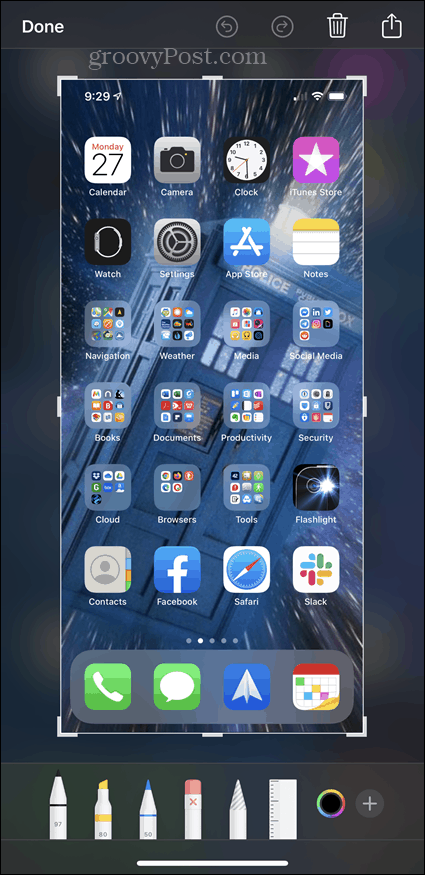
As we mentioned, when you take a screenshot, a thumbnail of the screenshot temporarily appears in the lower-left corner of your screen. Tap the thumbnail to open it (and edit it, if you want) or swipe left on the thumbnail to dismiss it. It will automatically go away after a few seconds. If you tapped the thumbnail, the screenshot opens in the editor. Use the tools to edit the screenshot and then tap Done.
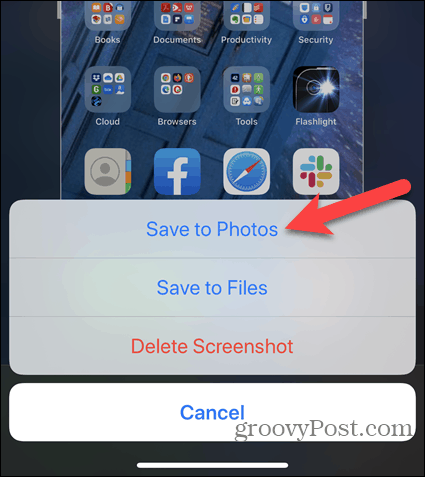
Tap Save to Photos to save the screenshot to your camera roll.
Take Screenshots of Just About Anything
Any of these procedures should work most of the time in most apps, though you may run into limitations at times. For example, I could not get a screenshot of the AssistiveTouch button or of the thumbnail of a screenshot. But, taking a screenshot is still a handy feature. Comment Name * Email *
Δ Save my name and email and send me emails as new comments are made to this post.
![]()

