An important thing to know is that the new tools only work in Google Chrome, at least at the time of this writing.
New Google+ Photo Editing
First of all, access the Photos section of your Google+ account. Do so by hovering your mouse cursor over Home on the top left side of your Google+ page. Then select Photos.
Now, select the picture or image you want to edit – or you can upload a new one.
A whole range of editing tools will appear on the right side of your screen.
How To Use the Editing Presets
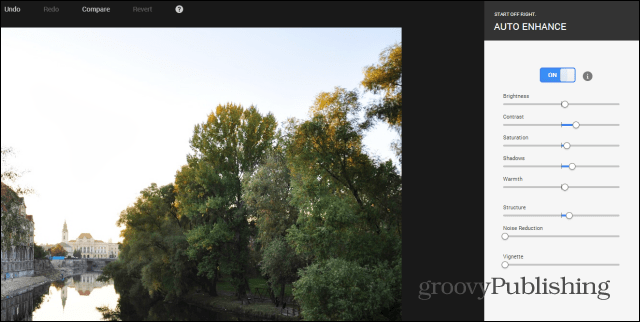
Your image has been Auto Enhanced upon upload, but you can adjust the improvements Google+ has made to it. Just click the Customize button next to Auto Enhance.
You’ll be able to see the improvements in real time as you adjust the sliders for the different effects until the result is to your liking. Once you’re done, click Apply. You can also turn Auto Enhance off altogether.
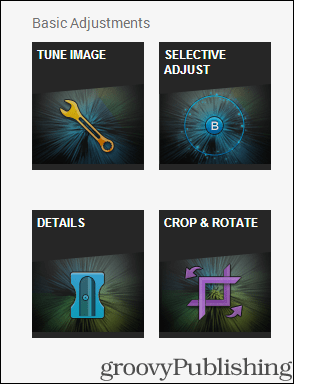
Now, if you want to play with the really powerful stuff, Google has provided you with a simple interface, with lots of customized presets. Let’s start with the Basic Adjustments area.
Click the Tune Image button first. You have six presets at your disposal, but you can adjust the results whichever way you want. In this example, I went with the Moody preset, but then I made the image warmer and more saturated. Don’t forget to hit Apply when the result are what you want.
If you need more accurate alterations, you can click Selective Adjust. It allows you to select an area of the image and then play with brightness, contrast and saturation. You can add multiple points and control parameters independently.
Next comes the Details button. Its purpose is to help you make your image sharper. Presets are provided, but you can make your own adjustments if you need to.
The Crop & Rotate feature can be useful, as you can straighten your image and also flip it right or left. Nothing revolutionary with this feature, but nice to have nonetheless.
Next come the fun and exciting edits in the Creative Adjustments area. This is where the place to unleash your inner artist. If you think your image would look better in Black & White, click the respective option and you’ll get six separate, adjustable presets. Deciding the color of the filter is also possible, for more accuracy.
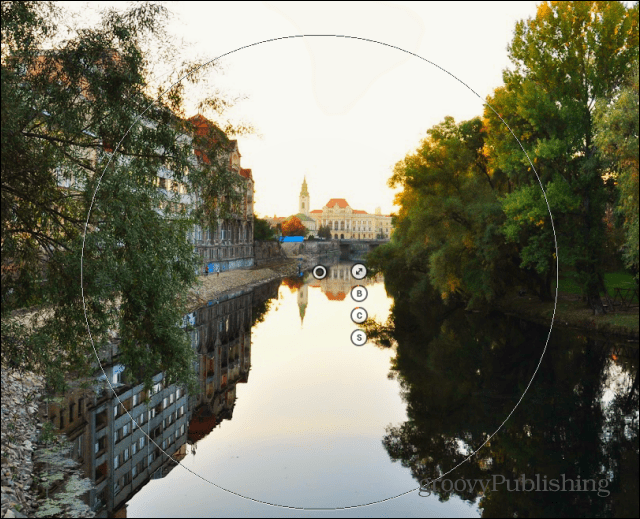
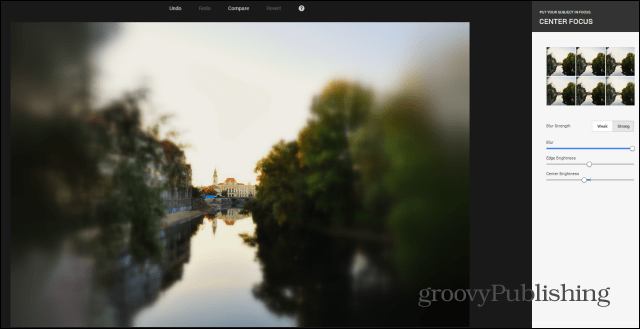
Next comes the feature I liked most. It’s called Center Focus and it allows you to easily emphasize the main subject of your image. You can decide the focused area, its size, as well as the amount of blur and fog the rest of the image will get. This feature can yield spectacular results, especially when used for portraits. I set it to Strong in the example below and then added more blur.
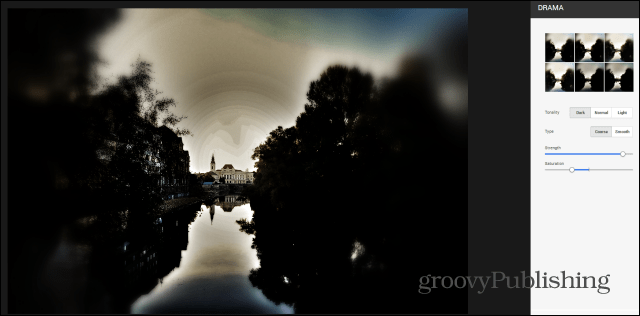
If you want to make your image even more spectacular, use the preset filters in the Drama section.
If you’re an Instagram fan, I’m sure you’ll want a frame for your image. Well, there’s 23 of them, and you can alter their size.
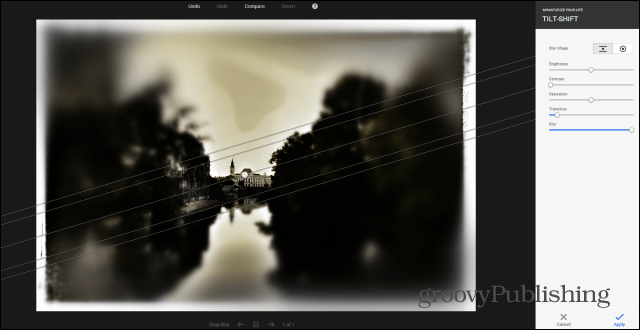
And if you haven’t messed around with focus enough, you can adjust the amount and shape of blurring, as well as the brightness, contrast and saturation of the area in the Tilt-Shift area.
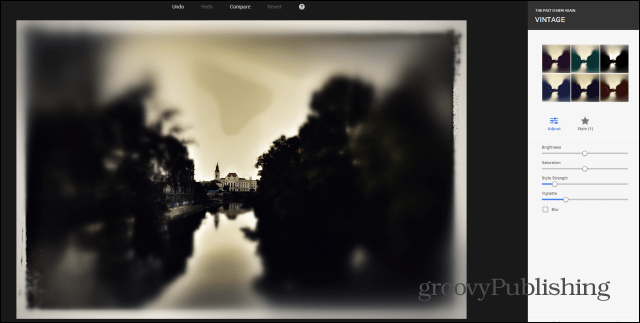
I mentioned Instagram fans a bit earlier. Well, Vintage is for them, as the button has six filters under its hood; however, they’re not the kind you’re used to, because you can start from one of them, add a custom Style and then play around with Brightness, Saturation, Style Strength and Vignette.
Now, while your photo may already look old when it comes to colors, it should also look like it’s been through a lot since your grandfather took it. Retrolux exists in order to cater to that need. You can add filters and styles that make the photo look scratched, or like some drops of liquid have ended up on its surface somewhere along the years.
Just to get a better idea, check out the difference between my original image and the edited one. The first one is a view of the center of my city a few months ago. I could probably trick someone that the second one has been taken in the same area, a few decades ago. Click to enlarge it: To get a better idea of what it can do, take a look at Google’s presentation video below. Comment Name * Email *
Δ Save my name and email and send me emails as new comments are made to this post.


![]()
